Upgrading your PlayStation 5 with an additional SSD is one of the best ways to expand storage for modern games. PS5 titles can be massive, and the console’s internal storage fills up quickly. Fortunately, Sony designed the PS5 to support user-installed M.2 NVMe SSDs — and the process is straightforward if you follow the steps carefully.
This guide walks you through everything you need to know about installing an SSD in your PS5.
✅ What You’ll Need
Before you begin, make sure you have:
- A compatible M.2 NVMe SSD
- A #1 Phillips (cross-head) screwdriver
- A clean, flat surface
- Good lighting
PS5 SSD Requirements
Your SSD must meet Sony’s specifications:
- Interface: PCIe Gen4 x4 M.2 NVMe
- Capacity: 250GB – 8TB
- Read speed: 5,500MB/s or faster (recommended)
- Size: 2230, 2242, 2260, 2280, or 22110
- Heatsink: Required (either built-in or attached)
⚠️ Important: The SSD must have an effective heatsink. Without one, the drive can overheat and throttle performance.
🔌 Step 1: Power Down and Unplug Your PS5
- Turn off your PS5 completely (not Rest Mode).
- Unplug the power cable and all other cables.
- Wait a few minutes to allow the system to cool.
- Place the console on a flat surface with the PS logo facing down and the power button facing you.
🛠 Step 2: Remove the PS5 Cover
- Hold the top-left corner and bottom-right corner of the white panel.
- Gently lift and slide the panel downward.
- The cover should pop off with slight pressure.
Don’t force it — it slides off rather than pulls straight up.
🔓 Step 3: Open the SSD Expansion Slot
- Locate the rectangular metal cover secured with a single screw.
- Remove the screw with your screwdriver.
- Lift off the metal cover to reveal the M.2 slot.
Inside, you’ll see a spacer and screw. You may need to reposition the spacer depending on your SSD length (e.g., 2280 is most common).
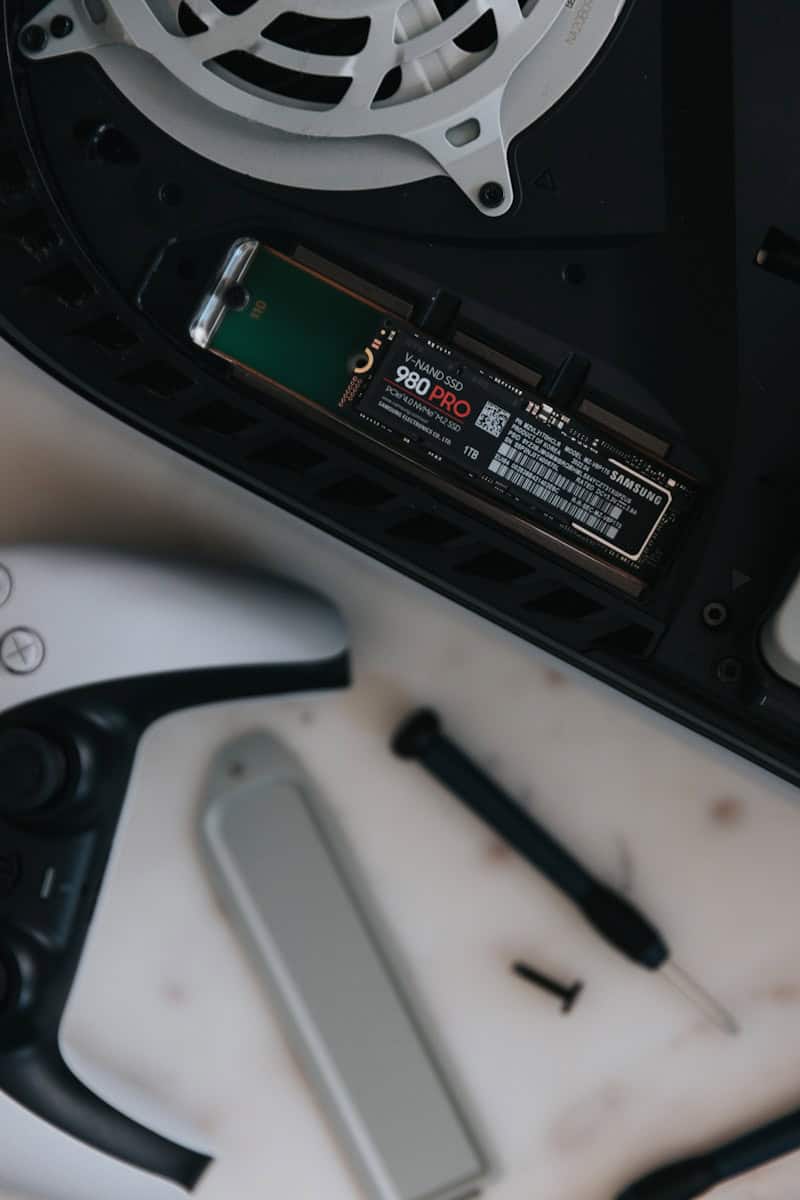
💾 Step 4: Insert the SSD
- Align the SSD with the connector at a slight upward angle (about 30 degrees).
- Insert it firmly into the slot.
- Gently press it down flat.
- Secure it using the screw and spacer.
Make sure it’s snug but not overtightened.
🔒 Step 5: Reassemble the PS5
- Replace the metal SSD cover and screw it back in.
- Slide the outer white panel back into place.
- Reconnect all cables.
- Power on your PS5.
🧩 Step 6: Format the SSD
When you turn on the PS5:
- The system will detect the new SSD automatically.
- You’ll be prompted to format the drive.
- Confirm and wait for the process to complete.
After formatting, the PS5 will display the drive’s read speed.
🎮 How to Move Games to Your New SSD
To transfer games:
- Go to Settings
- Select Storage
- Choose Console Storage
- Select Games and Apps
- Choose the games you want to move
- Select Move to M.2 SSD Storage
You can also set your PS5 to automatically install new games directly to the M.2 SSD.
🚀 Benefits of Installing an SSD
- More storage for PS5 games
- Faster load times (if using a high-speed Gen4 drive)
- Reduced need to delete and reinstall games
- Seamless integration with PS5 UI
❓ Common Questions
Can I play PS5 games directly from the SSD?
Yes. PS5 games run directly from the installed M.2 SSD.
Can I use a PS4 SSD?
No. The PS5 requires PCIe Gen4 NVMe drives.
Will installing an SSD void my warranty?
No. Sony officially supports user-installed M.2 SSD upgrades.
Final Thoughts
Installing an SSD in your PS5 is one of the easiest and most effective upgrades you can make. With the right drive and a few minutes of careful work, you can dramatically expand your console’s storage and improve your gaming experience.
If you’re running out of space, this upgrade is absolutely worth it.


