Google Docs is a free online word processor that lets you create and edit documents from any device with internet access. It’s part of Google’s suite of productivity tools and offers many features found in traditional desktop software. Google Docs saves your work automatically as you type, so you don’t have to worry about losing your progress.
Google Docs makes it easy to work with others on the same document at the same time. You can share files with just a few clicks and see changes in real-time. The tool also has built-in commenting and suggesting features for smooth teamwork.
This cloud-based word processor works well for both personal and business use. It has a clean interface that’s simple to learn. You can access your files from anywhere and pick up right where you left off on any device.
Unleashing the Power of Google Docs: A Comprehensive User Guide
Google Docs has revolutionized the way we write, collaborate, and share documents. It’s more than just a word processor; it’s a versatile tool that empowers individuals and teams to create, edit, and manage documents in the cloud. This guide will delve into the essential features and hidden gems of Google Docs, helping you unlock its full potential.
Getting Started: The Basics
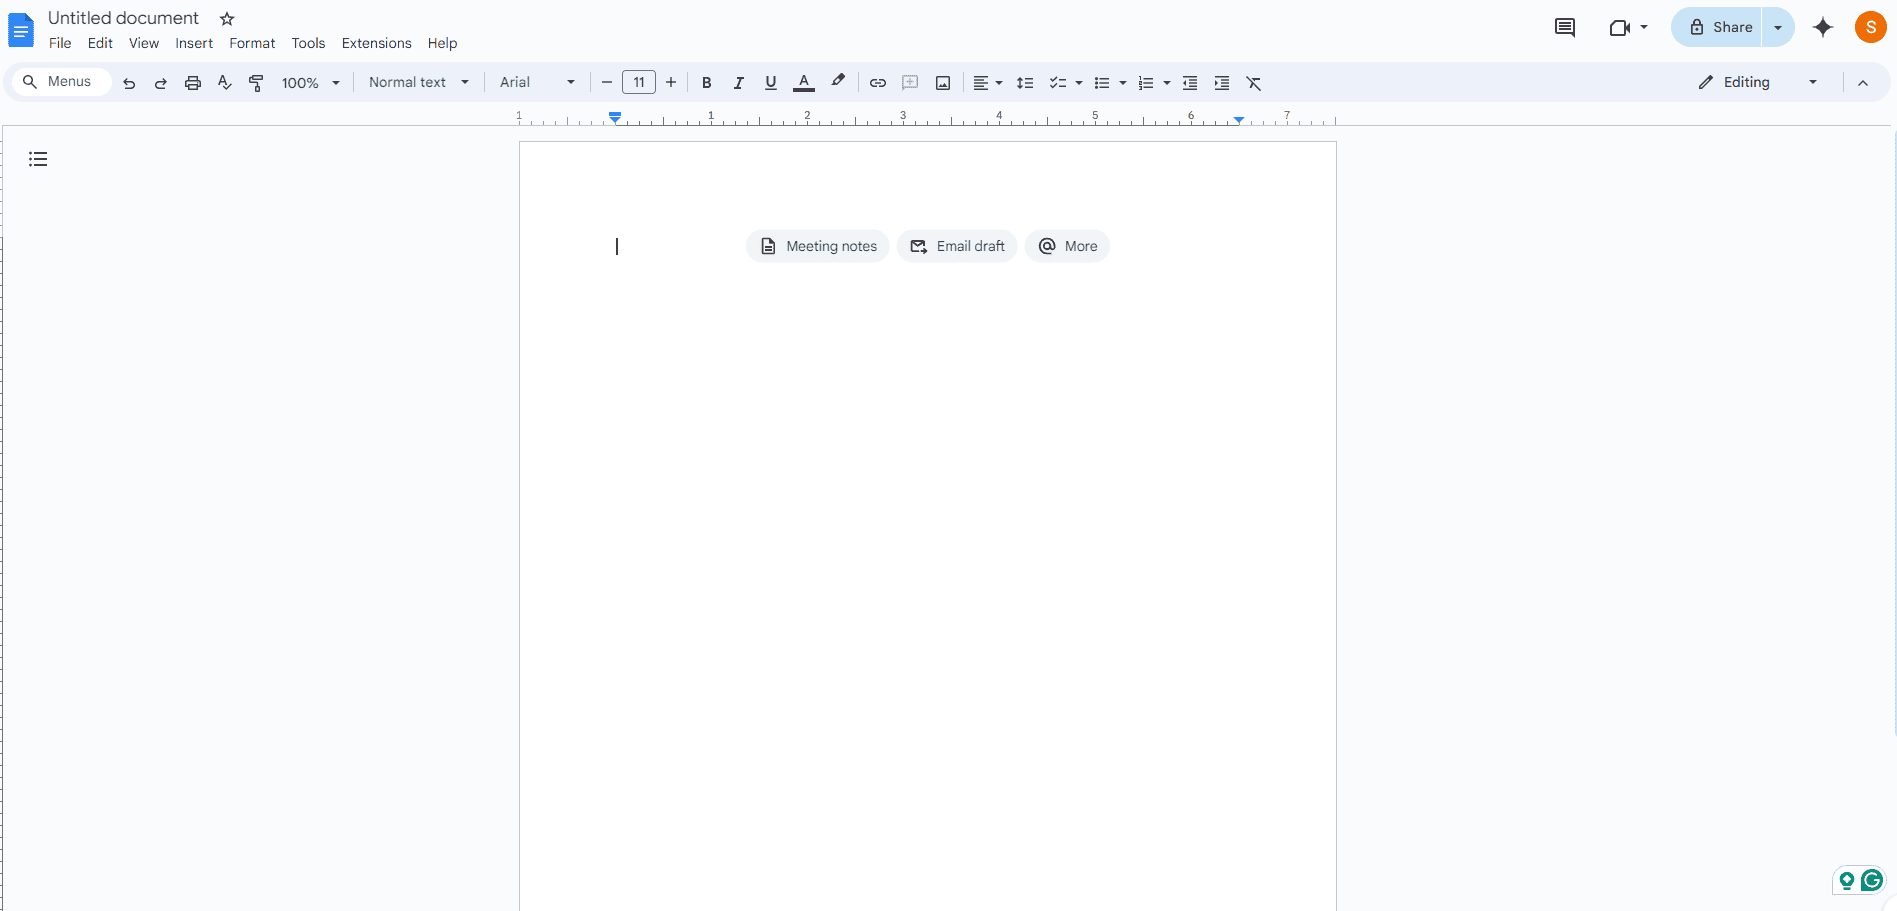
Creating a new document is simple. Just head to docs.google.com and click on the “+” button. You’ll be greeted with a blank canvas, ready for your words and ideas. Familiarize yourself with the toolbar, where you’ll find essential formatting options like font styles, sizes, headings, lists, and more. Google Docs offers a clean and intuitive interface, making it easy to get started even for first-time users.
Collaboration: Teamwork Made Easy
One of Google Docs’ greatest strengths is its collaborative capabilities. You can easily share your documents with others and work together in real-time. See who else is editing the document and watch their changes appear instantly. Use the built-in chat feature to communicate with collaborators directly within the document. With different access levels (editing, commenting, viewing), you can control how others interact with your document.
Beyond Words: Exploring Advanced Features
Google Docs goes beyond basic word processing. Insert images, tables, drawings, and even charts to enhance your documents. Explore the Insert menu to discover a wealth of options. Use the Table of contents feature to automatically generate a structured outline for lengthy documents. The Explore pane provides intelligent suggestions for related research, images, and topics, helping you enrich your content.
Hidden Gems: Productivity Boosters
Here are a few lesser-known features that can significantly enhance your workflow:
- Voice typing: Dictate your text directly into the document using your voice. This is a great way to speed up writing and capture ideas on the go.
- Version history: Access previous versions of your document and revert to earlier edits if needed. This provides a safety net and allows you to track changes over time.
- Offline access: Enable offline access to work on your documents even without an internet connection. Your changes will automatically sync when you’re back online.
- Add-ons: Extend Google Docs’ functionality with add-ons. These are like mini-apps that integrate directly into Docs, offering features like grammar checking, citation management, and more.
Mastering Formatting: Tips and Tricks
While the basic formatting options are straightforward, Google Docs offers advanced controls for those who want to fine-tune their documents. Use Styles to create consistent formatting throughout your document. Explore the Page setup options to adjust margins, orientation, and paper size. The Document outline provides a hierarchical view of your document’s structure, making it easy to navigate and organize sections.
Troubleshooting Common Issues
| Problem | Possible Solutions |
|---|---|
| Document is not saving | Check your internet connection. Make sure you have enough storage space in Google Drive. Try refreshing the page or restarting your browser. |
| Can’t access a shared document | Make sure you have the correct link or permission to access the document. Contact the document owner to request access. |
| Formatting issues | Clear formatting and reapply styles. Use the “Paint format” tool to copy formatting between sections. Check for conflicting styles or formatting overrides. |
Formatting Text: Beyond the Basics
Google Docs provides a range of formatting tools beyond font styles and sizes. Here are some tips to enhance your text formatting:
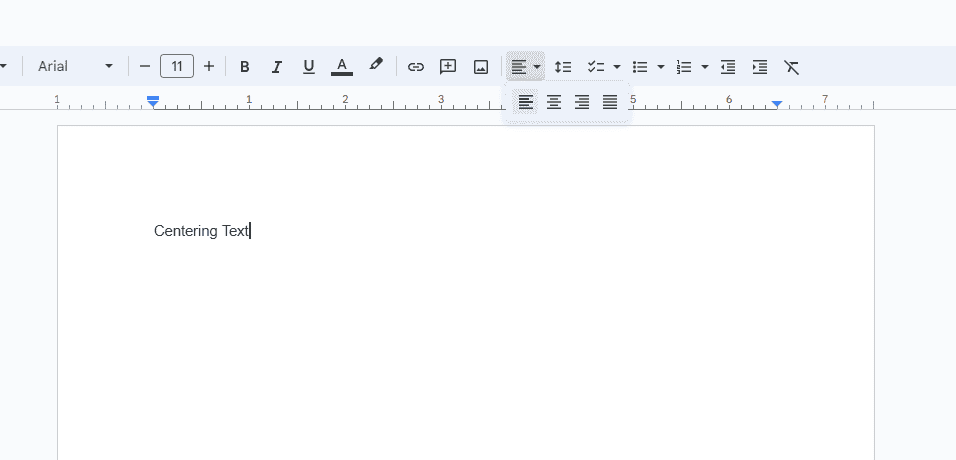
- Centering text: To center text, highlight the text and click the “Center align” icon in the toolbar (it looks like horizontal lines with a centered vertical line). To center text vertically on the page, go to File > Page setup and adjust the vertical alignment.
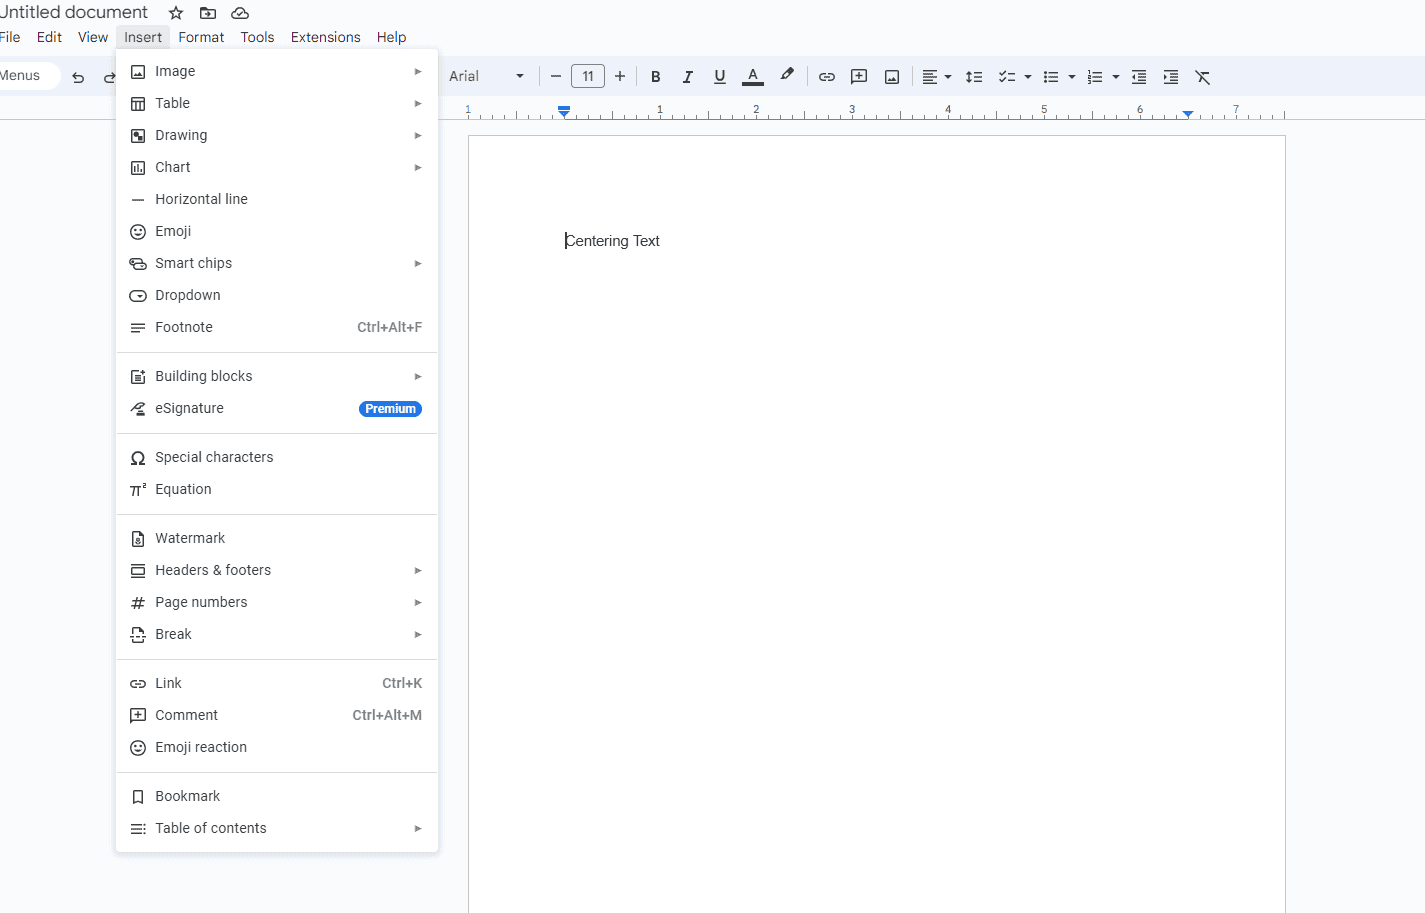
- Creating fractions: You can insert fractions using the special characters menu. Go to Insert > Special characters > Symbol > Math. Alternatively, use the equation editor (Insert > Equation) for more complex mathematical expressions.
- Making text vertical: While Google Docs doesn’t have a direct option to make text vertical, you can achieve this by inserting a drawing (Insert > Drawing) and rotating the text box within the drawing.
- Circling words: Insert a drawing, then use the “Shape” tool to draw a circle around the word.
- Changing the color of a horizontal line: Insert a horizontal line (Insert > Horizontal line). Then, click on the line and select a color from the toolbar’s “Line color” option.
Working with Lists and Bullet Points
Google Docs offers flexible options for creating lists and bullet points:
- Adding a sub bullet point: Press the “Tab” key to indent a bullet point and create a sub-level.
- Moving a bullet point back: Press “Shift + Tab” to outdent a bullet point and move it to a higher level.
- Adding another bullet point: Press “Enter” after a bullet point to create a new one at the same level.
- Making smaller bullet points: You can adjust the indent level of bullet points to make them appear smaller. Go to Format > Align & indent > Indentation options and adjust the “Left” value.
Managing Tables
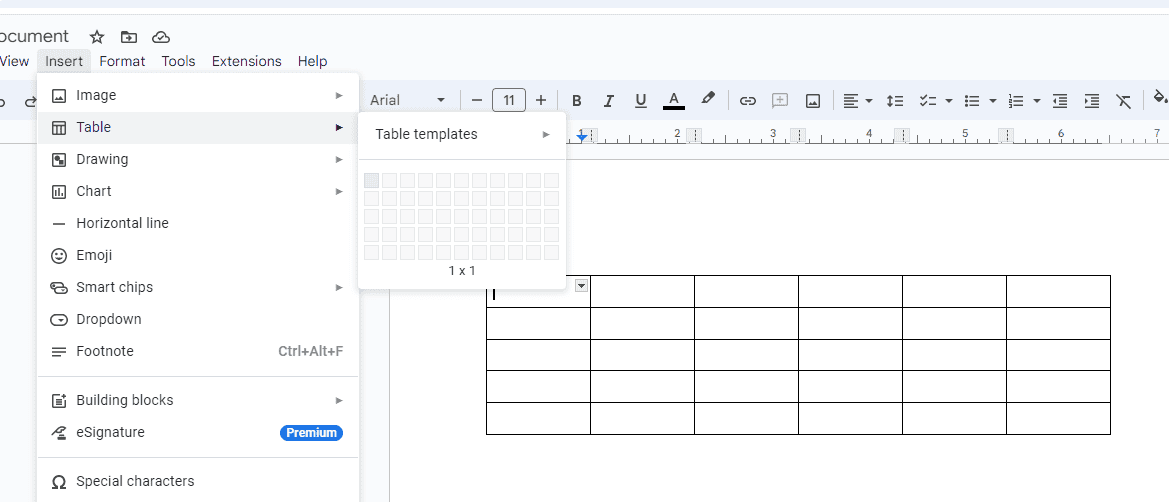
Google Docs allows you to easily create and modify tables:
- Deleting columns: Click on the column header to select the entire column, then right-click and choose “Delete column.”
- Deleting rows: Click on the row number to select the entire row, then right-click and choose “Delete row.”
Page Setup and Printing
Customize your document’s layout and printing options:
- 1-inch margins: Go to File > Page setup and set all margins to 1 inch.
- Printing a booklet: Go to File > Print and choose “Booklet” as the printing option. This will format your document for printing on both sides of the page and folding into a booklet.
Miscellaneous Tips and Tricks
Here are a few more handy features to enhance your Google Docs experience:
- Paragraph symbol: To show paragraph marks and other hidden formatting symbols, click the “Show formatting marks” icon in the toolbar (it looks like a paragraph symbol).
- Turning off track changes: Go to Tools > Suggesting to switch from “Suggesting” mode to “Editing” mode, which disables track changes.
- Finding the trash: Go to drive.google.com and click on “Trash” in the left sidebar.
- Google Docs code block: Use the code block feature (Insert > Building blocks > Code block) to format code snippets.
- Removing footnotes: Click on the footnote marker in the text, then press “Delete.”
- Getting rid of weird spacing: Check for extra paragraph breaks, line spacing settings, or conflicting styles. Use the “Clear formatting” option to reset formatting.
- Naming a link: Insert a link (Insert > Link), then type the desired text in the “Text” field. This will display the custom text instead of the URL.
- Dark mode: Enable dark mode in your device’s system settings, and Google Docs will automatically switch to a dark theme.
- Viewing multiple pages: Unfortunately, Google Docs doesn’t currently support viewing multiple pages side-by-side.
- Adding company document property field: This feature is typically available in Microsoft Word, not Google Docs.
- Scaling a document in Word: In Microsoft Word, go to Layout > Size and choose a scaling option.
By mastering these features and techniques, you can elevate your Google Docs skills and create professional, polished documents with ease.
Key Takeaways
- Google Docs is a free online word processor that saves work automatically
- Users can easily share and collaborate on documents in real-time
- The tool is accessible from any device with internet access
Getting Started with Google Docs
Google Docs is a free online word processor. It lets you create and edit documents from your computer or phone. You can work alone or with others in real time.
Creating and Accessing Documents
To use Google Docs, you need a Google Account. Once you have one, go to docs.google.com. Click “Blank” to start a new document or “Template gallery” to choose a pre-made design.
You can also open Google Docs from Google Drive. Click “New” and select “Google Docs”. Your work saves automatically to Drive as you type.
For mobile users, download the Google Docs app. It works on both Android and iOS devices. The app lets you create and edit documents on the go.
Want to work without internet? Turn on offline mode in your Google Drive settings. This allows you to access and edit files when you’re not connected.
The Google Docs Interface
The Google Docs screen is simple to use. At the top, you’ll see the menu bar with options like File, Edit, and View. Below that is the toolbar with formatting tools.
The main part of the screen is your document. This is where you type and edit your text. On the right side, you may see a column for comments if they’re turned on.
To add images or tables, use the Insert menu. For spelling checks, go to Tools and select “Spelling and grammar”.
Google Docs saves your work as you type. But you can also click the “Save” icon to be sure. It looks like a floppy disk.
Setting Up Google Account and Google Drive Integration
To start with Google Docs, set up a Google Account first. Go to accounts.google.com and click “Create account”. Follow the steps to make your account.
Once you have an account, Google Drive is ready to use. It stores all your Google Docs files. You get 15 GB of free space to start.
To organize your files, create folders in Drive. Click “New” and select “Folder”. Give it a name and press “Create”.
You can upload files from your computer to Google Drive. Click “New”, then “File upload”. Choose the file you want to add. Google Docs can open many file types, including Microsoft Word documents.
Writing and Editing Tools
Google Docs offers many features to help you create and polish documents. These tools make writing easier and improve the quality of your work.
Basic Text Formatting and Styles
Google Docs lets you change how your text looks. You can make words bold, italic, or underlined. To do this, select the text and click the B, I, or U buttons at the top. You can also change font size and color.
Styles help you format quickly. Click “Normal text” in the toolbar to see options like Title, Heading 1, and Heading 2. These styles make your document look neat and organized.
You can add bullet points or numbered lists. Click the list icons in the toolbar. This is great for making steps or lists easy to read.
Advanced Editing Features
Google Docs has tools to help you write better. The spelling and grammar check finds mistakes as you type. Red lines show spelling errors, and blue lines show grammar issues. Right-click these words to see fixes.
You can track your progress with the word count tool. Find it under “Tools” in the menu. It shows how many words, characters, and pages you’ve written.
Tables help organize information. Click “Insert” then “Table” to add one. You can change the number of rows and columns to fit your needs.
Utilizing Find and Replace
Find and Replace helps you change words quickly. Press Ctrl+F (or Cmd+F on Mac) to open the Find box. Type the word you want to find. Google Docs will show where it appears.
To replace words, click the three dots next to the Find box. Choose “Find and replace”. Type the new word in the “Replace with” box. You can replace one word at a time or all at once.
This tool saves time when you need to fix repeated mistakes or update terms throughout your document.
Voice Typing and Keyboard Shortcuts
Voice typing lets you write by speaking. Go to “Tools” and click “Voice typing”. A microphone icon will appear. Click it and start talking. Google Docs turns your words into text.
Keyboard shortcuts make editing faster. Here are some useful ones:
- Ctrl+C: Copy
- Ctrl+V: Paste
- Ctrl+Z: Undo
- Ctrl+Y: Redo
To see more shortcuts, go to “Help” and click “Keyboard shortcuts”. Learning these can speed up your work in Google Docs.
Collaboration and Sharing
Google Docs makes working together easy. You can edit with others in real-time, control who sees your files, and track changes over time.
Real-Time Editing and Collaboration Features
Google Docs lets multiple people work on a file at once. You can see others typing and making changes as they happen. This is great for team projects or group assignments.
The comment feature helps you give feedback. Click and highlight text, then add your thoughts. Others can reply to comments too. This makes it simple to discuss ideas without changing the main document.
Google Docs also has a chat function. You can talk with other editors right in the document. This is useful for quick questions or planning next steps.
Managing Sharing Permissions and Links
You control who can see and edit your files. Click the “Share” button to get started. You can add people by email or create a shareable link.
There are three main permission levels:
- Viewer: Can read but not change the document
- Commenter: Can make suggestions and comments
- Editor: Can make direct changes to the document
You can change these settings anytime. This lets you adjust who can do what as your project needs change.
Version History and Revision Management
Google Docs saves your work automatically. It also keeps a record of all changes made to the document. This is called version history.
To see old versions:
- Click “File”
- Select “Version history”
- Choose “See version history”
You can view past edits and who made them. This is helpful if you need to undo changes or check what was changed. You can even name important versions to find them easily later.
Working with Images
Google Docs allows you to insert and manipulate images to enhance your documents:
- Fitting an image to page: Select the image, and a toolbar will appear. Click the “Image options” icon (it looks like a small square with lines on it). In the “Size & rotation” section, adjust the height and width or use the “Scale” slider to resize the image.
- Overlapping images: Insert multiple images and drag them to overlap as desired. Use the “Wrap text” option in the “Image options” to control how text flows around the images.
- Moving an image to the front: Select the image, right-click, and choose “Order > Bring to front.”
- Grouping images: Unfortunately, Google Docs doesn’t have a direct “group” feature for images. However, you can insert the images into a drawing (Insert > Drawing) and group them within the drawing canvas.
- Mirroring an image: Insert the image into a drawing and use the “Flip horizontally” or “Flip vertically” options in the drawing toolbar.
- Drawing on an image: Insert the image into a drawing and use the drawing tools (lines, shapes, text boxes) to annotate the image.
Inserting Special Elements
Add visual and interactive elements to your documents:
- Inserting a signature line: While Google Docs doesn’t have a dedicated signature line feature, you can insert a drawing and use the line tool to create a line for signing. Alternatively, use an add-on like “DocuSign” for electronic signatures.
- Inserting a video: Go to Insert > Video and paste the video URL from YouTube or Google Drive.
Advanced Formatting and Layout
Google Docs provides advanced options for customizing the look and feel of your documents:
- Making bubble letters: While Google Docs doesn’t have a built-in bubble letter feature, you can achieve a similar effect using Word Art (Insert > Drawing > + New > Text box). Choose a font with rounded edges and adjust the fill color and outline to create a bubble-like appearance.
- Small caps: Highlight the text and go to Format > Text > Capitalization > Small caps.
- Indenting a paragraph: Place your cursor in the paragraph and press the “Tab” key to indent the first line. To indent the entire paragraph, adjust the “Left” indent in Format > Align & indent > Indentation options.
- Coloring a table: Select the table, click the “Table options” icon, and choose a color from the “Table background color” option.
- Reducing space between bullet and text: Adjust the “Special indent” value in Format > Align & indent > Indentation options.
- Turning all caps into lowercase: Highlight the text and press “Shift + F3” to cycle through capitalization options.
- Text direction: Go to Format > Text > Text direction to change the direction of text.
- Drawing an arrow: Insert a drawing and use the “Shape” tool to draw an arrow.
- Google Doc header size: Go to Insert > Headers & footers and adjust the header’s height. To change the font size within the header, simply select the text and choose a different size.
- Putting last name and page number in header: Insert a header, then type your last name. Go to Insert > Page numbers and choose the desired position for the page number.
- Exiting subscript: After typing subscript text, press “Ctrl + .” (period) to return to normal text.
- Making a title page: Insert a page break (Insert > Break > Page break) at the beginning of your document. Then, format the first page as your title page.
- Rotating a table: Unfortunately, Google Docs doesn’t currently support rotating tables.
- Getting exponents: Use the equation editor (Insert > Equation) to create exponents.
- Adding a cover page: Same as making a title page – insert a page break and format the first page.
- Double spacing on iPad: Highlight the text, tap the “A” icon in the toolbar, and choose “Line spacing > Double.”
- Redlining a Google Doc: Use “Suggesting” mode (Tools > Suggesting) to make edits that appear as suggestions with redlining.
- Checking how many characters: Go to Tools > Word count.
- Creating two columns: Go to Format > Columns and choose the number of columns.
- Force copy a Google Doc: If you have “View only” access, you can try selecting all the content (Ctrl + A), copying it (Ctrl + C), and pasting it into a new document.
- Painting format: Select the text with the desired formatting, click the “Paint format” icon (it looks like a paint roller), and then select the text you want to apply the formatting to.
- Removing a section break: Click on the section break and press “Delete.”
- Changing margins: Go to File > Page setup and adjust the margin values.
- Undoing strikethrough: Highlight the text and click the “Strikethrough” icon again to remove it.
- Putting in alphabetical order: Select the text or list items, then go to Tools > Sort by alphabet.
- Adding bookmarks: Unfortunately, Google Docs doesn’t currently support bookmarks in the traditional sense. You can, however, use internal links to jump to specific sections within the document.
- Creating labels without add-ons: While there’s no built-in label feature, you can use tables or drawing tools to create label-like layouts.
- Removing page border: Go to File > Page setup and set the “Page color” to “White.”
- Adding accent marks: Use the “Insert > Special characters” menu to find and insert accent marks.
- Merging cells: Select the cells you want to merge, right-click, and choose “Merge cells.”
- Getting rid of page breaks: Click on the page break and press “Delete.”
- Copying a page: Select all the content on the page (Ctrl + A), copy it (Ctrl + C), insert a page break (Insert > Break > Page break), and paste the content (Ctrl + V) onto the new page.
- Envelope template: Go to File > New > From template gallery and search for “envelope” to find templates.
- Rearranging pages: Unfortunately, Google Docs doesn’t have a drag-and-drop interface for rearranging pages. You can copy and paste content to move it between pages.
- Hanging indent: Go to Format > Align & indent > Indentation options and adjust the “Special indent” value.
- Vertical text: Insert a drawing and rotate the text box within the drawing.
- Putting two tables side by side: Insert the tables, adjust their widths, and use the “Wrap text” option in the “Table options” to control their positioning.
By exploring these features and techniques, you can unlock the full potential of Google Docs and become a document-creating pro!

