When your PC starts acting up — random crashes, no power, failed boots — your motherboard could be the culprit. Because the motherboard connects every component in your system, even small issues can cause major headaches. In this guide, we’ll walk you through how to troubleshoot common motherboard problems, how to diagnose symptoms, and what steps you can take to fix them.
Common Signs of Motherboard Problems
Identifying motherboard issues early can save you a lot of time (and money). Here are typical symptoms:
- No Power or Boot Failures: System doesn’t turn on or gets stuck at POST.
- Random Shutdowns/Reboots: Computer powers off or reboots with no warning.
- Beep Codes or LED Error Indicators: Motherboard debug LEDs light up, or you hear beep codes.
- No Display: Fans spin, but nothing appears on the monitor.
- USB Ports/Peripherals Not Working: Ports become unresponsive or don’t recognize devices.
- Burning Smells or Visible Damage: Signs of electrical short or component failure.
If you’re experiencing any of these issues, follow the steps below.
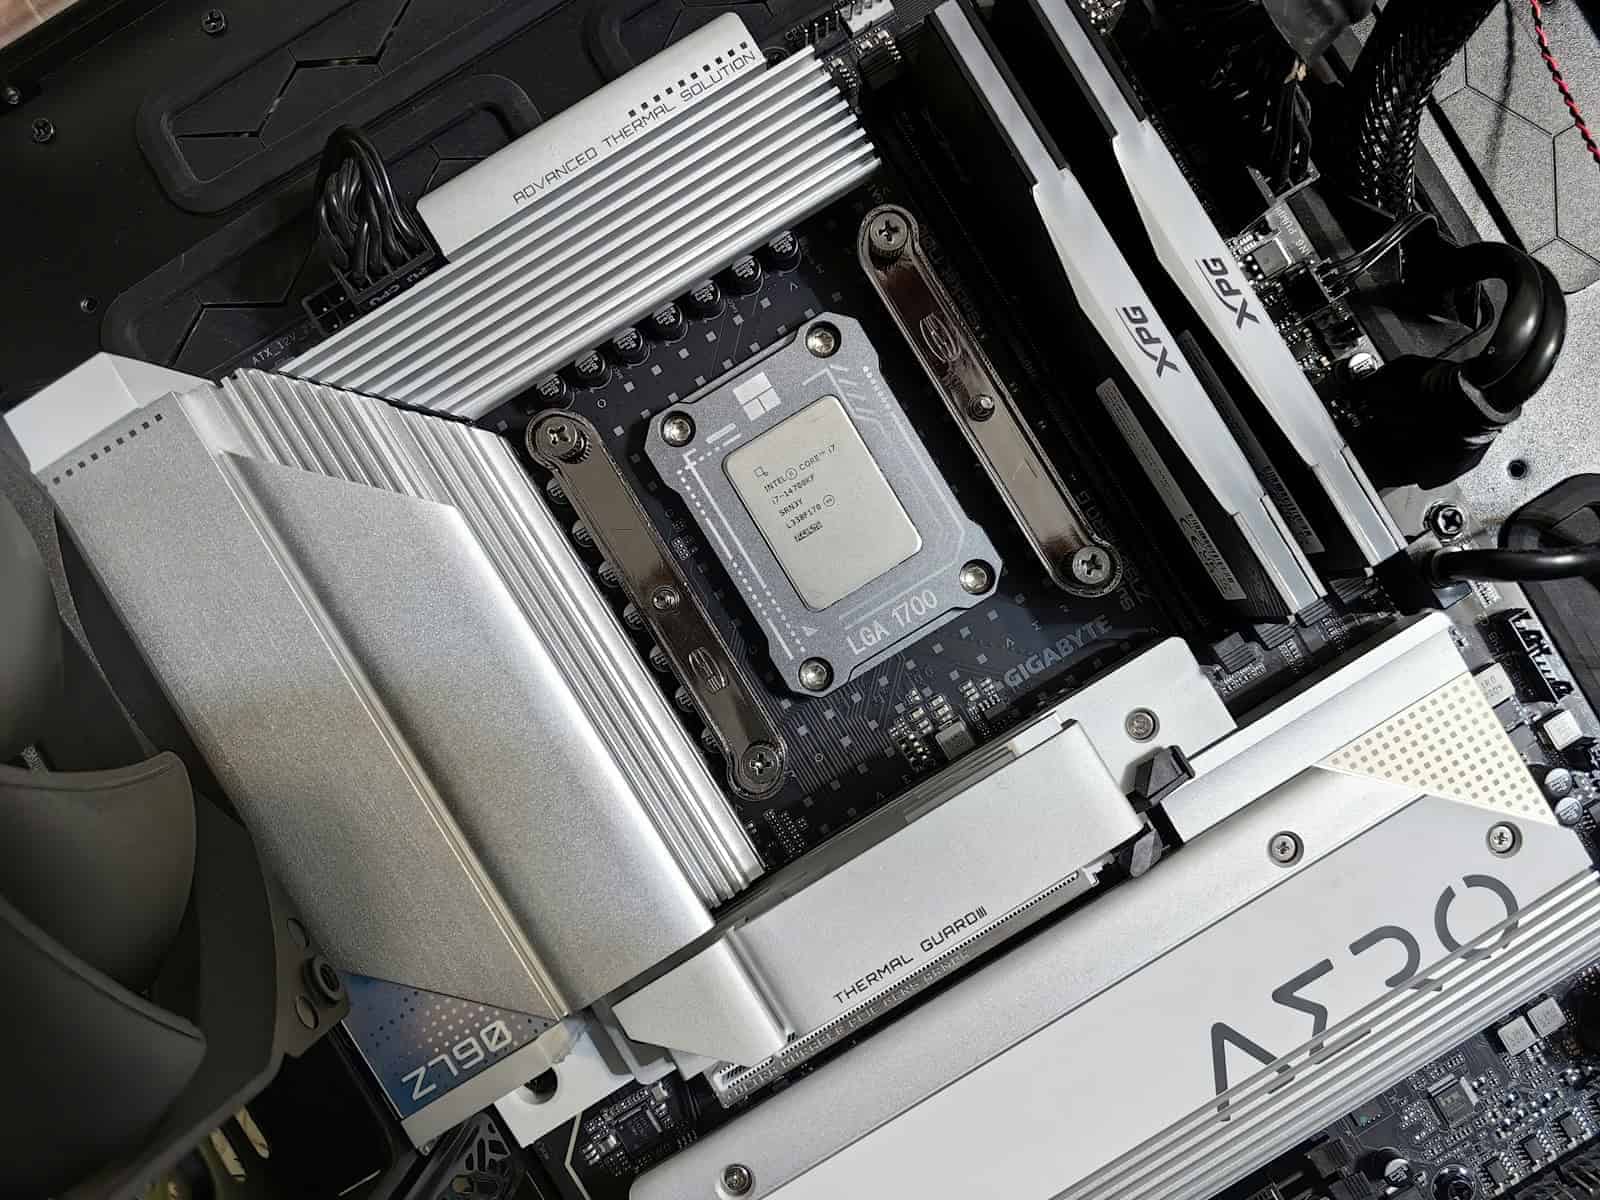
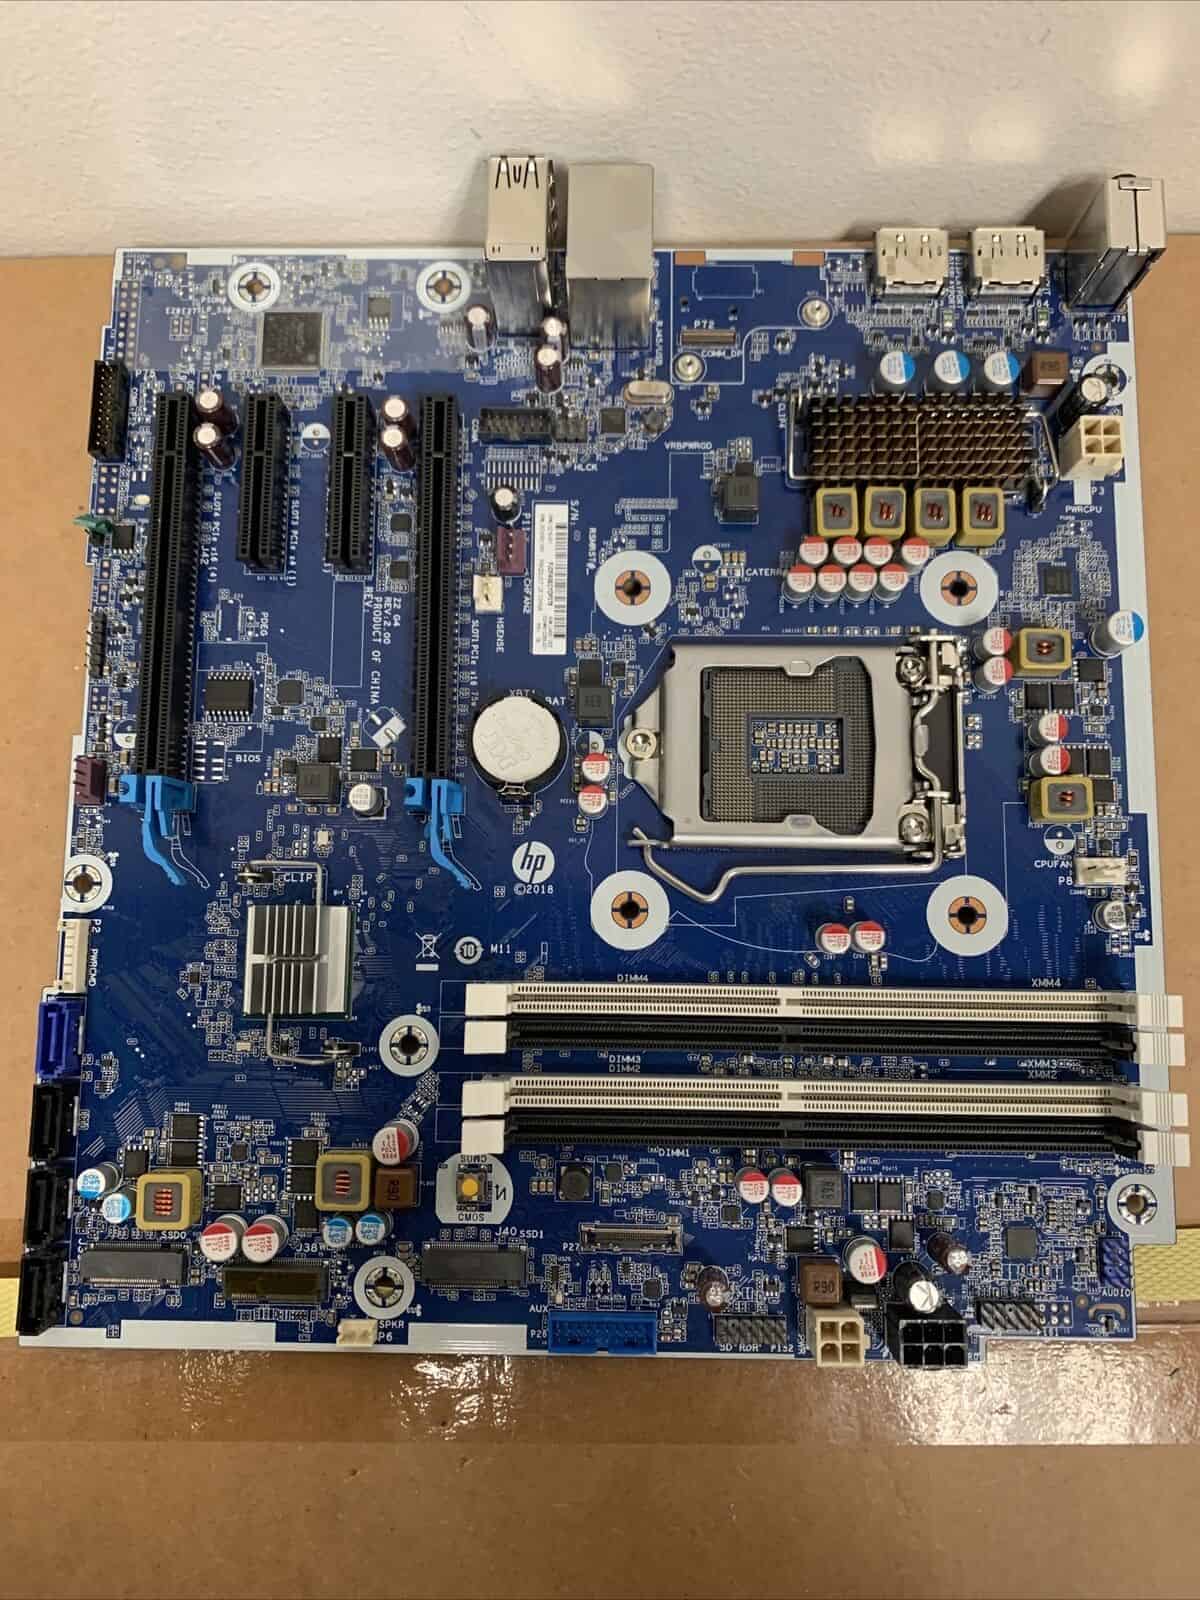
Step 1: Basic Visual Inspection
Before diving into complicated diagnostics, perform a basic check:
| What to Check | What to Look For |
|---|---|
| Cables and Connections | Ensure all power cables (24-pin ATX, CPU 8-pin, GPU cables) are properly seated. |
| Motherboard Condition | Look for bulging capacitors, burn marks, or bent pins (especially in CPU socket). |
| RAM and GPU Seating | Make sure RAM sticks and GPUs are fully clicked into their slots. |
| Dust or Debris | Heavy dust buildup can cause shorts or overheating. Clean with compressed air. |
If everything looks fine physically, move on to testing.
Step 2: Check Power Delivery
Motherboards can fail if they aren’t getting proper power. Here’s how to check:
- Test Your Power Supply Unit (PSU): Use a PSU tester or swap with a known working PSU.
- Inspect Power Cables: Check the 24-pin motherboard cable and 8-pin CPU cable for damage.
- Check Power Button Wiring: The front panel connectors (PWR_SW) may be loose or misaligned.
If the PSU and cables are fine but there’s still no response, the issue could be deeper.
Step 3: Listen for Beep Codes or LED Indicators
Most modern motherboards give you clues when something goes wrong:
| Indicator | Meaning |
|---|---|
| Single Beep | Successful POST. |
| Continuous Beeps | RAM or motherboard failure. |
| Two/Three Beeps | GPU not detected or malfunctioning. |
| No Beeps, No Lights | Power delivery problem or dead motherboard. |
Tip: Always refer to your motherboard manual for exact beep or LED codes.
Step 4: Test With Minimal Hardware
Strip your system down to the bare essentials:
- Motherboard
- CPU
- One stick of RAM
- Power Supply
- (Integrated graphics or minimal GPU if needed)
Try booting in this “minimal configuration.” If the system boots, you know one of the removed components is causing problems.
Step 5: Swap Components (If Possible)
- Test Different RAM: Faulty RAM can mimic motherboard failure symptoms.
- Try Another GPU: Bad graphics cards can cause no-display issues.
- Use Another PSU: An unstable or underpowered PSU can fail under load.
This process of elimination can help narrow down the true cause.
Step 6: Clear the CMOS
Resetting the motherboard’s BIOS settings can fix boot issues:
- Power off and unplug the system.
- Locate the CMOS battery (silver coin-shaped battery).
- Remove it for about 5 minutes.
- Reinsert the battery and power up.
Alternatively, use the “Clear CMOS” jumper on the board if available.
Step 7: BIOS Update (Advanced)
Sometimes motherboards need a BIOS update for newer CPUs or memory support. If your board has “BIOS Flashback” functionality, you can update the BIOS even without a working CPU or RAM installed.
⚠️ Warning: Incorrect BIOS updates can permanently damage your motherboard. Only update if you’re certain it’s necessary.
Step 8: When to Suspect a Dead Motherboard
If you’ve tested:
- PSU is good
- RAM and GPU are good
- Front panel connectors are correct
- No signs of life (no power, no POST, no debug LEDs)
…the motherboard itself may have failed. Common causes include:
- Electrical surge
- Manufacturing defect
- Physical damage
- Capacitor failure over time
In this case, replacing the motherboard is usually the only fix.
Quick Troubleshooting Reference Table
| Symptom | Likely Cause | Solution |
|---|---|---|
| No power, no fans, no lights | PSU failure, motherboard failure | Test PSU, check power cables |
| Powers on, but no display | RAM issue, GPU failure, CPU/motherboard issue | Reseat RAM/GPU, clear CMOS |
| Continuous beeping | RAM failure, motherboard failure | Swap/test RAM |
| Random reboots | PSU instability, overheating, motherboard VRM issues | Check PSU, clean system, monitor temps |
| USB ports not working | BIOS settings, damaged ports | Update BIOS, check ports, motherboard RMA |
Final Tips
- Use a surge protector: Protect your PC from electrical spikes.
- Document everything: Keep track of changes during troubleshooting.
- Consult your motherboard manual: Always your best friend for front panel wiring, beep codes, and jumpers.
- Don’t rush: Systematic troubleshooting saves more time than guesswork.
Key Takeaways
- A lit VGA light indicates the motherboard cannot detect or communicate properly with a graphics card, preventing normal system boot.
- Basic troubleshooting includes reseating the graphics card, checking power connections, and testing with different PCIe slots.
- Hardware issues like faulty GPUs, inadequate power supplies, or motherboard problems often require component replacement or professional repair.
Understanding the VGA Light Indicator
When your computer’s motherboard displays a VGA light, it’s often trying to tell you something important about your graphics system. This small LED indicator lights up when your motherboard can’t properly detect or communicate with your graphics card. The VGA light on a motherboard typically signals issues like a faulty graphics card, improper GPU seating, a bad motherboard slot, or even problems with RAM or power supply.
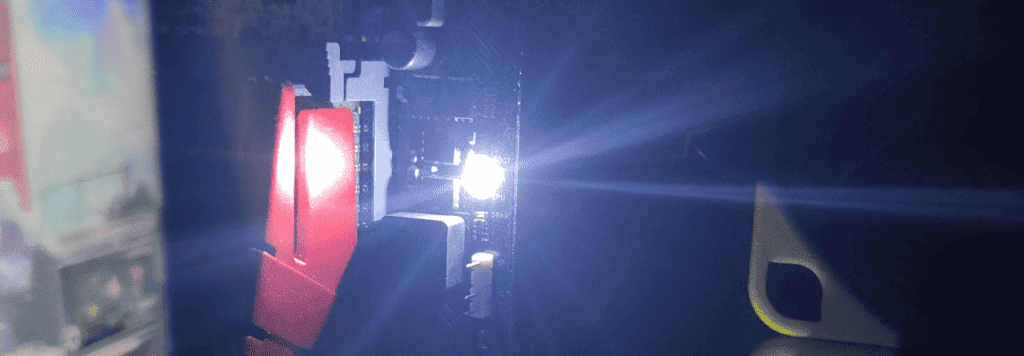
Many PC users face this frustrating situation – their computer powers on, fans spin, but the screen remains blank while the VGA light glows steadily. This problem affects various motherboard brands including ASUS, MSI, and others. The good news is that in many cases, you can resolve this issue through systematic troubleshooting without needing expensive replacements.
Understanding this warning light is the first step to getting your computer working again. The solutions range from simple fixes like reseating components to more complex diagnostics involving hardware swaps. With the right approach, you can identify whether you’re dealing with a minor connection issue or a more serious hardware failure.
The VGA light on your motherboard serves as an important diagnostic tool that helps identify graphics-related issues with your computer. This indicator illuminates when there’s a problem with your graphics processing components, giving you a starting point for troubleshooting.
Significance of the VGA Light
The VGA light is part of the motherboard’s diagnostic system specifically designed to alert users to graphics card problems. When this light turns on, it typically means your system cannot properly initialize the graphics component during startup.
This indicator helps narrow down hardware issues without requiring advanced technical skills. On most motherboards, the VGA light appears alongside other diagnostic LEDs for CPU, RAM, and boot devices.
Different motherboard manufacturers may use various colors for the VGA light – red, white, or yellow being the most common. The light’s behavior (solid or blinking) can sometimes provide additional information about the specific issue affecting your graphics system.
Common Causes of VGA Light Activation
Several problems can trigger the VGA light on your motherboard. The most frequent cause is a malfunctioning or improperly seated graphics card (GPU). This might require reseating the card in its PCIe slot or replacing it entirely if damaged.
Poor connections between your GPU and motherboard often lead to VGA light issues. Dust accumulation in the PCIe slot or bent pins can disrupt these connections.
Incompatible or outdated GPU drivers sometimes trigger the VGA light. In systems with both dedicated and integrated graphics (iGPU), conflicts between these components may occur.
Power-related problems, such as insufficient power supply or loose power connectors to the GPU, commonly activate the VGA light. RAM issues can occasionally trigger this indicator as well, especially if RAM is required for graphics processing.
Initial Troubleshooting Steps
When a VGA light appears on your motherboard, it usually signals a graphics card issue. Before replacing expensive components, these simple steps can often fix the problem without needing technical expertise.
Power Supply Unit Checks
Start by examining your power supply unit (PSU) as it’s often the root cause of VGA light issues. Check if all power cables are properly connected to the graphics card – most modern GPUs require dedicated power connectors from the PSU.
Make sure the PSU delivers enough wattage for your system. A graphics card without sufficient power may trigger the VGA warning light. High-end graphics cards typically need 500-750 watts or more, depending on your other components.
Try reconnecting the power cables or using different PCIe power connectors from your PSU. Sometimes, a specific cable or connector might be faulty while others work fine.
RAM and GPU Seating
Poor seating of components is a common yet easily fixable problem. Turn off your computer completely and unplug it before opening the case.
Locate your graphics card and carefully remove it from the PCIe slot. Check for dust or debris in the slot and on the card’s connectors. Use compressed air to clean both gently.
Firmly but gently reinsert the GPU, ensuring it clicks into place. Check that the securing latch on the PCIe slot engages properly.
Similarly, reseat your RAM modules, as memory issues can sometimes trigger VGA lights. Remove each RAM stick and reinsert it, making sure they’re properly secured.
Clearing the CMOS
The CMOS stores your motherboard’s configuration settings. Resetting it can resolve conflicts causing VGA light problems. Always check your motherboard manual for specific instructions.
To clear the CMOS, first shut down and unplug your computer. Find the clear CMOS jumper on your motherboard (usually labeled CLRTC or CLR_CMOS) and move it from pins 1-2 to pins 2-3 for about 10 seconds.
Alternatively, remove the CMOS battery (the silver coin cell) for about 5 minutes. This drains residual power and resets all BIOS settings.
After clearing, return any jumpers to their original position and reinsert the battery if removed. This reset forces the motherboard to rebuild connections with all components, often fixing detection issues.
Advanced Diagnostic Techniques
When standard troubleshooting fails to resolve a VGA light issue, advanced methods can help pinpoint the exact problem. These techniques require more technical knowledge but can save time and potentially avoid unnecessary hardware replacements.
Performing a BIOS Update
An outdated BIOS can cause compatibility issues with newer graphics cards, triggering the VGA light. Check the motherboard manufacturer’s website for the latest BIOS version specific to your model.
Before updating, record your current BIOS settings as they may reset during the process. Download the correct BIOS file and follow the manufacturer’s instructions carefully. Most modern motherboards offer a BIOS Flashback feature that allows updates via USB drive without needing a working CPU or RAM.
For Intel systems, especially those with newer processors like Core i9 or Emerald Rapids architecture, BIOS updates often include crucial microcode updates. These improve hardware recognition and stability.
Warning: Never interrupt a BIOS update as this can brick your motherboard. Ensure stable power during the entire process.
Checking for Compatible Hardware
Hardware compatibility issues frequently trigger VGA lights. Verify that your graphics card is supported by your motherboard and power supply.
Check PCIe generation compatibility between your motherboard and GPU. While newer cards like GTX 1060 can work in older slots, they may need BIOS settings adjusted for proper detection.
Examine your motherboard’s QVL (Qualified Vendor List) to confirm support for your specific components. Some combinations of hardware require specific configurations to work properly together.
Memory issues can also trigger VGA errors. Try testing with a single DRAM stick or different memory configurations. Sometimes, the system won’t boot with certain memory configurations when using specific graphics cards.
Power requirements are critical. High-performance GPUs need adequate and stable power delivery. Ensure your PSU meets both wattage and amperage requirements on the 12V rail.
Frequently Asked Questions
Dealing with a VGA light on your motherboard can be frustrating, but many solutions exist for this common problem. Understanding what the light indicates and how to address it can save time and potentially costly repairs.
What steps can I take to diagnose and resolve an illuminated VGA light on my motherboard?
First, check all cable connections between your graphics card and monitor. Make sure both the video cable (HDMI, DisplayPort, or VGA) and power cables are securely connected.
Try reseating your graphics card. Power down your computer completely, unplug it, then carefully remove and reinsert the GPU into its PCIe slot. This often resolves contact issues.
Check your power supply to ensure it’s providing adequate power to your components. An underpowered system can trigger VGA lights even when other components appear to work.
How can I troubleshoot a VGA light that remains on, yet my GPU appears to be functioning properly?
This situation often indicates a partial connection issue. The GPU might be receiving power but not properly communicating with the motherboard.
Try moving your graphics card to a different PCIe slot if available. This can help determine if the issue is with the slot rather than the card itself.
Update your motherboard BIOS to the latest version. Outdated BIOS versions sometimes cause compatibility issues with newer graphics cards.
What does it signify when there is no display but the VGA indicator light is active on my motherboard?
A lit VGA light with no display typically indicates the motherboard has detected an issue with the graphics processing. The computer can’t complete the boot process due to this error.
Try connecting your monitor to a different port on your graphics card or to the motherboard’s integrated graphics (if available). This can help isolate whether the problem is with the output port.
Clear your CMOS by following your motherboard manufacturer’s instructions. This resets BIOS settings to default and can resolve conflicts causing the VGA light.
What are some common solutions for a white or red VGA light issue on various motherboard brands such as ASUS, MSI, or Gigabyte?
For ASUS motherboards, try using the MemOK! button if available, as memory issues can sometimes trigger VGA lights. Also check their Q-LED codes in the manual for specific diagnoses.
MSI motherboards often benefit from trying their “Clear CMOS” button or jumper. Some models also have debug LEDs that provide more specific information alongside the VGA light.
Gigabyte boards typically respond well to removing all non-essential hardware and testing with minimal components. Their manuals often provide specific troubleshooting steps for their LED indicators.
Can a VGA light on a motherboard indicate a GPU-related problem even if the light is on?
Yes, the VGA light specifically indicates the motherboard has detected an issue with graphics processing. This is almost always GPU-related, even when the card appears to be receiving power.
Physical damage to the GPU that isn’t visible can trigger the light. Check for signs of overheating, such as discoloration on the card or unusual fan behavior.
BIOS settings can also cause conflicts. Try resetting graphics-related BIOS settings to default, particularly those involving PCIe generation selection or graphics priority.
What troubleshooting methods should I follow when my motherboard’s VGA light turns on at startup and there is no video output on the monitor?
Start by disconnecting and reconnecting all power cables to both the motherboard and graphics card. Ensure the PCIe power connectors are properly seated in the graphics card.
Try booting with a different known-working graphics card if possible. This quickly determines if your original card is failing.
Remove all RAM sticks except one, and try booting. If that fails, try each stick individually in different slots. Sometimes memory issues can trigger VGA lights.