The Raspberry Pi has captured the imagination of tech enthusiasts and DIY hobbyists since its introduction. This tiny, affordable computer offers endless possibilities for creative projects, from simple programming exercises to complex home automation systems. Anyone can transform a Raspberry Pi into useful tools like ad-blocking networks, retro gaming consoles, or even home media servers with minimal investment and basic technical skills.
Whether you’re a complete beginner or an experienced maker, Raspberry Pi projects provide an accessible way to learn coding, electronics, and computer science principles. The Raspberry Pi Projects Hub on Reddit showcases the community’s creativity with ideas ranging from torrent automation to network-wide ad-blocking solutions. The versatility of these credit card-sized computers continues to inspire new applications as technology evolves.
1) Raspberry Pi Weather Station
A Raspberry Pi weather station is a practical and educational project that combines hardware and software to collect environmental data. This project lets you monitor local weather conditions like temperature, humidity, and atmospheric pressure right from your home.
The Raspberry Pi, a small but powerful computer, serves as the brain of the operation. It collects data from various sensors and can be programmed to process and display this information in different ways.
To start building a weather station, you’ll need a Raspberry Pi board and appropriate sensors. The Pimoroni Weather HAT and Sensors Kit offers a convenient solution that includes all necessary components and allows you to upload data to a web dashboard.
For beginners, the Raspberry Pi Foundation offers a comprehensive guide to build your own weather station using a breadboard for initial prototyping. This approach helps understand the fundamentals before moving to a more permanent setup.
One of the most appealing aspects of this project is data visualization. Creators can develop custom dashboards to display weather information in user-friendly formats. Some enthusiasts have built systems that show current and future weather forecasts along with local rain radar information.
Programming skills come in handy when building a weather station. Python is commonly used for this purpose, with many project tutorials available online that guide makers through the process step by step.
The display options are flexible. Some weather stations use dedicated monitors, while others utilize the official Raspberry Pi touchscreen. There are examples of weather station apps designed specifically for the 7-inch 800×480 touch screen that run in full-screen mode via the Chromium browser.
Weather stations can be expanded to include additional features like wind speed sensors, rain gauges, and even cameras for sky conditions. The modular nature of Raspberry Pi makes adding components relatively straightforward.
For those interested in citizen science, a Pi weather station can contribute data to larger weather monitoring networks. This helps improve local forecasts and climate research while giving the project greater purpose.
Power considerations are important for outdoor installations. Weather stations can be designed to run on batteries with solar charging systems for true standalone operation in remote locations.
Data logging capabilities allow for tracking weather patterns over time. This historical data can be analyzed to identify trends and seasonal changes in local climate conditions.
2) Retro Gaming Console with Raspberry Pi
Turning a Raspberry Pi into a retro gaming console is one of the most popular projects for this versatile single-board computer. This project lets gamers enjoy classic titles from systems like Nintendo, Sega, and PlayStation on modern displays.
The Raspberry Pi 5 is particularly well-suited for retro gaming due to its improved processing power. Users can build a retro gaming console using Batocera v40, a specialized operating system that simplifies the emulation setup process.
For those on a budget, even the more affordable Raspberry Pi models can handle older gaming systems effectively. With about $100 worth of components, enthusiasts can create a comprehensive retro gaming setup that runs multiple classic consoles.
RetroPie is another popular operating system specifically designed for gaming on the Raspberry Pi. It provides a user-friendly interface for organizing and playing retro games across dozens of classic systems.
The physical build options for these consoles are incredibly diverse. Some creators design custom aluminum chassis, while others use 3D-printed cases that resemble miniature versions of classic consoles.
One innovative creator used a Raspberry Pi 3 Model A+ to build a custom Game Boy with an aluminum chassis made from scrap materials. This project demonstrates how the Raspberry Pi can breathe new life into beloved portable gaming formats.
Controllers are an essential consideration for any retro gaming setup. Many builders opt for USB replicas of classic controllers, though Bluetooth options provide greater flexibility for wireless play.
Storage requirements depend on the size of the game library. A 32GB microSD card is sufficient for casual use, but serious collectors may want to invest in external storage solutions to accommodate larger ROM collections.
The legal aspect of ROM usage should be considered. Users should only download games they legally own physical copies of, as copyright laws still apply to retro games.
Setting up a retro gaming console with Raspberry Pi requires minimal technical expertise. Multiple detailed tutorials are available online, making this project accessible even to beginners with limited programming experience.
The community surrounding Raspberry Pi retro gaming is active and supportive. Forums and social media groups offer troubleshooting help and share configuration tips to optimize performance across different emulators.
Commercial options are also available for those who prefer ready-made solutions. Several companies offer pre-built Raspberry Pi gaming consoles with games pre-installed, though building one from scratch offers greater customization.
3) Raspberry Pi Smart Mirror
A smart mirror is one of the most popular and impressive Raspberry Pi projects for makers. These interactive mirrors display useful information like weather, calendar events, and news while you get ready for your day.
Creating a Raspberry Pi smart mirror involves combining a two-way mirror with a display monitor and a Raspberry Pi. The result looks like a regular mirror, but also shows digital content that appears to float on the glass surface.
Most smart mirror projects use MagicMirror², a free, open-source software platform designed specifically for this purpose. This software is highly customizable with modules for different information displays.
For beginners, this project offers a great introduction to Raspberry Pi capabilities. The basic components needed include a Raspberry Pi board, monitor or display, two-way mirror, frame, and power supply.
The cost can vary significantly depending on the materials chosen. Some makers have completed smart mirror projects for around $100, while others invest more for larger displays or premium frames.
Setting up the Raspberry Pi involves installing the operating system and the MagicMirror² software. The software configuration allows you to choose which modules to display and how the information should be arranged.
Popular modules include time and date, weather forecasts, calendar appointments, news headlines, and compliments. More advanced users can create custom modules to display specific information relevant to their needs.
The physical build requires mounting the mirror over the display and creating a frame to hold everything together. The Raspberry Pi is typically mounted behind the display to keep the setup clean and compact.
University students often select smart mirrors as final year projects because they combine hardware, software, and design elements. They offer plenty of opportunities for customization and creative problem-solving.
Step-by-step tutorials are widely available, making this project accessible even for those new to Raspberry Pi. Many guides break down the process into manageable steps from initial setup to final installation.
The mirror can be as simple or complex as desired. Basic versions show time and weather, while advanced models might include voice control, motion sensors, facial recognition, or integration with smart home systems.
Power consumption is relatively low, especially when using energy-efficient displays. Many users keep their smart mirrors running continuously to provide information at a glance throughout the day.
For a sleeker look, some makers opt for super-slim designs that minimize the profile of the mirror. This requires careful planning of component placement and cable management.
The versatility of this project makes it perfect for different skill levels. Beginners can follow basic instructions, while advanced makers can add custom features and integrations.
4) Home Automation Hub using Raspberry Pi
The Raspberry Pi makes an excellent brain for home automation systems. This small computer can control various smart devices throughout your home without breaking the bank. With a Raspberry Pi, users can create a centralized system that manages lights, thermostats, security cameras, and more.
Setting up a home automation hub starts with installing appropriate software. Popular options include Home Assistant, OpenHAB, and Domoticz. These platforms provide user-friendly interfaces that help coordinate all smart devices on a network.
Home Assistant is particularly well-regarded in the Raspberry Pi community. It offers compatibility with over 1,000 different smart devices and services. Users can install it on a Raspberry Pi 3 or newer model for optimal performance.
Smart lighting represents one of the most common automation projects. A Raspberry Pi can control lights on demand, dim them through apps, or create scheduled routines. This functionality eliminates the need for expensive commercial systems.
Security applications provide another valuable use case. A Raspberry Pi can power a smart doorbell or CCTV camera system. These DIY solutions often cost significantly less than pre-made alternatives while offering similar functionality.
Voice control integration enhances any home automation system. Creating a DIY Alexa-like assistant with a Raspberry Pi allows for voice commands throughout the home. This requires adding a microphone and speaker to the setup.
Environmental monitoring represents another practical application. A Raspberry Pi with appropriate sensors can track temperature, humidity, and air quality. The system can then adjust connected thermostats or air purifiers automatically.
Practical sensors extend the system’s capabilities. Many enthusiasts add mailbox sensors to receive notifications when mail arrives. This simple addition demonstrates how creative solutions can solve everyday problems.
Power management offers substantial benefits. Smart plugs controlled by a Raspberry Pi can turn devices on or off according to schedules or conditions. This helps reduce energy consumption and lower utility bills.
Custom dashboards provide convenient control. Most home automation software includes web interfaces accessible from phones or computers. These dashboards display system status and allow easy control of connected devices.
Integration with existing systems expands functionality. A Raspberry Pi hub can work alongside commercial products like Philips Hue or Nest thermostats. This creates a unified system that combines the best of both DIY and commercial options.
Automating a standing desk shows how creative these projects can become. The Raspberry Pi can control motors to adjust desk height based on time of day or user preferences, creating an ergonomic workspace.
Community support makes these projects accessible to beginners. The Raspberry Pi forums offer numerous guides and troubleshooting help for home automation projects. This resource helps newcomers overcome technical challenges.
5) Raspberry Pi Surveillance Camera
The Raspberry Pi makes an excellent platform for creating your own surveillance camera system. With its small size and low power consumption, it’s perfect for discreet monitoring of your home or property.
Setting up a basic surveillance camera requires just a Raspberry Pi board, a compatible camera module, and the right software. The Pi can be configured to record HD video when movement is detected in the monitored area.
One popular software option is MotionEyeOS, which transforms your Raspberry Pi into a complete surveillance system. This specialized operating system is designed specifically for camera applications and offers features like motion detection, time-lapse recording, and remote viewing.
For those concerned about home security, a Pi-based surveillance system offers significant cost savings compared to commercial alternatives. A complete setup can be assembled for under $100, depending on the components chosen.
The flexibility of the Raspberry Pi allows for numerous customizations. Users can add multiple camera modules, implement night vision capabilities, or even set up alerts that send notifications when movement is detected.
Storage options include saving footage locally on an SD card or external drive. More advanced setups might upload recordings to cloud storage or a network-attached storage device for safekeeping.
Power options are flexible as well. The camera can run on standard wall power or be modified to use battery power for temporary or remote installations where power outlets aren’t available.
Weather-resistant cases are available for outdoor installation, making it possible to monitor entryways, gardens, or other exterior areas. These enclosures protect the electronics while maintaining visibility for the camera.
The security camera project works with various Raspberry Pi models, from the compact Pi Zero to the more powerful Pi 4. The model selection depends on desired features and performance requirements.
Advanced users can enhance their surveillance systems with additional capabilities. Adding motion sensors, implementing facial recognition, or creating time-lapse videos are all possible extensions of the basic project.
Remote access features allow homeowners to check camera feeds from anywhere using a smartphone or computer. This provides peace of mind while away from home, allowing users to monitor their property from any location with internet access.
The project serves as an excellent introduction to both hardware and software aspects of computing. Builders gain experience with Linux systems, networking, and basic programming while creating something immediately useful.
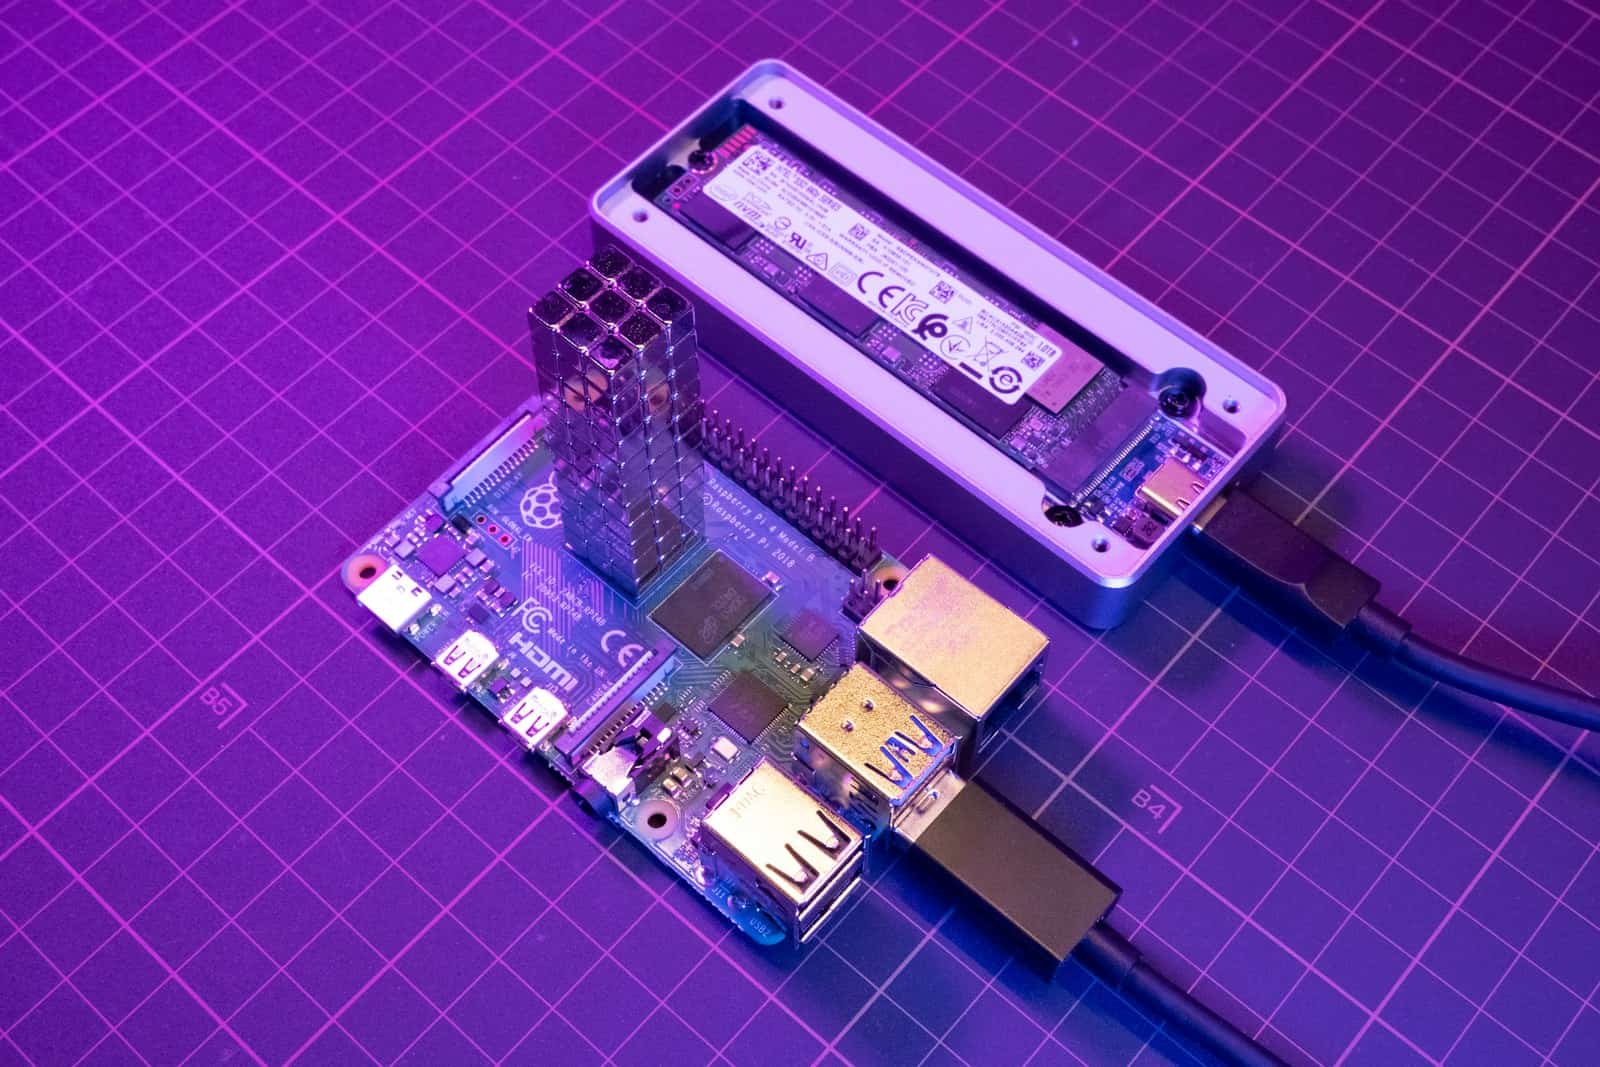
6) DIY Raspberry Pi NAS Server
A Network Attached Storage (NAS) server is one of the most practical projects you can build with a Raspberry Pi. This affordable setup gives you a personal cloud storage system accessible from any device on your network.
The Raspberry Pi makes an excellent foundation for a home NAS due to its low power consumption and compact size. Many enthusiasts have turned a Pi 4 into a NAS by simply connecting hard drives via USB and setting up Samba shares.
For storage options, builders can use various media types. The project works with USB flash drives, hard disk drives (HDD), or solid state drives (SSD). SSDs offer faster speeds but at a higher cost, while HDDs provide more storage space per dollar.
Setting up the hardware requires minimal components. A Raspberry Pi (model 4 or 5 recommended for better performance), a power supply, microSD card for the operating system, and external storage drives form the basic setup.
The new Raspberry Pi 5 has enhanced the NAS-building experience with its improved processing power. Some enthusiasts have created ultimate NAS builds using this latest model, taking advantage of its faster USB ports and improved thermal management.
For the software, many builders use specialized operating systems like OpenMediaVault or DietPi. These systems simplify the NAS setup process and provide user-friendly interfaces for managing files and user permissions.
More advanced builders have created elaborate multi-bay setups. Some have constructed 4-bay Raspberry Pi 5 NAS systems using special expansion boards like the Radxa Penta SATA Hat, allowing connection of multiple solid-state drives.
The beauty of a DIY NAS project lies in its flexibility. Builders can start with a basic $35 setup and gradually expand as their storage needs grow. This scalability makes it an ideal project for beginners and experienced makers alike.
Once configured, a Raspberry Pi NAS can handle various functions beyond simple file storage. Media streaming, backup solutions, and even hosting a personal website become possible with the right software configuration.
For those concerned about reliability, implementing redundancy through RAID configurations offers protection against drive failures. Though this requires additional drives and setup complexity, it provides peace of mind for important data storage.
The energy efficiency of a Raspberry Pi NAS shouldn’t be overlooked. Compared to commercial NAS units or repurposed desktop computers, a Pi-based solution consumes significantly less power while running 24/7, saving both energy and money.
7) Magic Mirror with Raspberry Pi Display
A Magic Mirror is one of the most impressive Raspberry Pi projects you can build at home. This smart mirror displays useful information like weather, calendar events, and news while functioning as a regular mirror.
The basic concept is simple. You place a monitor behind a two-way mirror, controlled by a Raspberry Pi. When the screen is on, the information shines through the mirror surface.
Getting started with a Magic Mirror project requires a few key components. You’ll need a Raspberry Pi (preferably Pi 3 or newer), a monitor, a two-way mirror, and a frame to hold everything together.
MagicMirror² is the most popular software for this project. This open-source platform makes it easy to set up your display with various modules and widgets.
Setting up the software is straightforward. After installing Raspberry Pi OS, you can install MagicMirror² and configure it to show the information you want. Many users add weather forecasts, calendar appointments, and news headlines.
The physical construction is where creativity comes in. Some builders create super-slim designs that look professionally made, while others use simpler frames and materials.
Two-way mirror options include actual glass mirrors or acrylic sheets with mirror film applied. The acrylic option is lighter and safer but may have slightly lower quality reflection.
Many university students choose this as a final project because it combines hardware, software, and design elements. It demonstrates practical application of programming skills.
Customization is what makes Magic Mirrors special. You can add modules to display stock prices, social media feeds, compliments, or even voice control functionality using additional components.
Power consumption should be considered for long-term use. Setting the Raspberry Pi to turn the display on and off at certain times helps save electricity when the mirror isn’t being used.
One advantage of building a Magic Mirror yourself instead of buying a commercial one is the flexibility to update and modify it. As new modules are developed by the community, you can add them to your mirror.
For beginners, starting with a small mirror and basic modules is recommended. As you get comfortable with the system, you can expand to larger displays or more advanced features.
Some builders have integrated motion sensors so the display only activates when someone stands in front of the mirror. This adds a magical element while conserving power.
The Raspberry Pi community has shared many build guides and tips for troubleshooting common issues. This support network makes Magic Mirrors an accessible project even for those new to Raspberry Pi.
8) Portable Hacking Station with Raspberry Pi
The Raspberry Pi makes an excellent foundation for a portable hacking station due to its small size, low power requirements, and powerful capabilities. Security professionals and ethical hackers can create a compact device that fits in a pocket yet contains all the tools needed for network testing and security assessments.
The Raspberry Pi Zero W is particularly well-suited for this project due to its tiny form factor and built-in wireless connectivity. This model has made a name for itself as one of the premier devices for everything wireless in the security testing community.
Setting up a portable hacking station usually involves installing specialized Linux distributions like Kali Linux or Parrot OS. These operating systems come pre-loaded with hundreds of security tools for various testing scenarios and vulnerability assessments.
The physical build typically includes the Pi, a battery pack for power, and sometimes a small touchscreen display. Some creators have developed stealthy DIY cybersecurity mini computers that combine these elements into a professional-looking package.
For more advanced setups, the Raspberry Pi 4 or 5 provides additional processing power and memory. These models can handle more demanding security tools and concurrent operations, making them suitable for serious penetration testing work.
Some builders have created more substantial portable systems by adding keyboards and displays to create portable ‘laptop-like’ hacking stations. These setups offer the convenience of a laptop with the customization and tool access of a dedicated security platform.
Storage considerations are important when building a hacking station. A high-speed microSD card with ample storage ensures quick boot times and enough space for tools and captured data during security assessments.
Connectivity options should be maximized for versatility in the field. Adding USB adapters for additional wireless interfaces or Ethernet connections expands the station’s capabilities for different network environments.
Professionals can enhance their portable stations with specialized hardware like rubber ducky adapters, wireless adapters with monitor mode support, or GPIO-connected hardware tools. These additions extend the functionality for specific security testing scenarios.
Learning to use such a device effectively can significantly enhance a cybersecurity professional’s resume by demonstrating practical skills in operating systems, networking technologies, and ethical hacking techniques.
The ethical use of such devices must always be emphasized. These portable hacking stations should only be used for legitimate security testing with proper authorization, educational purposes, or personal skill development on networks the operator owns.
9) Raspberry Pi IoT Sensor Network
A Raspberry Pi IoT sensor network allows you to collect data from multiple sensors placed throughout your home, office, or outdoor space. This project is perfect for monitoring environmental conditions and creating a connected ecosystem of devices that work together.
The basic concept involves using a Raspberry Pi as the central hub that receives, processes, and stores data from various sensors. These sensors can measure temperature, humidity, light levels, motion, or even air quality depending on your needs.
One of the most appealing aspects of building an IoT sensor network is its scalability. You can start with just a few temperature and humidity sensors compatible with Raspberry Pi and gradually expand your network as you become more comfortable with the technology.
To get started, you’ll need a Raspberry Pi (model 3 or 4 recommended for better network capabilities), a selection of sensors, and some basic wiring components. The Pi will serve as your central server, while the sensors will be your data collection points.
For beginners, a simple weather station project makes an excellent entry point into IoT sensor networks. This typically involves temperature, humidity, and barometric pressure sensors reporting data to your Raspberry Pi.
Data from your sensor network can be visualized using platforms like Grafana or Node-RED. These tools create dashboards that display real-time information from your sensors in an easy-to-understand format.
The real power of an IoT sensor network comes from automation possibilities. For example, your network could trigger a fan when temperature rises above a certain threshold or send alerts to your phone when motion is detected in your home.
Security considerations are important when building any IoT project. Ensure your Raspberry Pi is password-protected and consider keeping sensitive data local rather than cloud-based if privacy is a concern.
Many IoT beginners find success with environmental monitoring systems. These projects provide valuable data while being relatively straightforward to implement with a Raspberry Pi.
For more advanced implementations, consider adding actuators to your network. These devices can physically respond to sensor data – like automatic blinds that close when light sensors detect excessive brightness.
Communication between devices in your sensor network typically uses protocols like MQTT or HTTP. MQTT is particularly popular for IoT projects due to its lightweight nature and efficiency on low-bandwidth networks.
Power management becomes important as your network grows. Consider using low-power sensors and implementing sleep modes when continuous monitoring isn’t required.
Raspberry Pi-based IoT projects can be enhanced with cloud integration. Services like AWS IoT or Google Cloud IoT Core allow for more sophisticated data analysis and remote access to your sensor network.
The educational value of building an IoT sensor network cannot be overstated. This project teaches programming, networking, electronics, and data analysis skills in a practical, hands-on way.
10) Raspberry Pi Media Center with Kodi
The Raspberry Pi makes an excellent and affordable media center for your home entertainment setup. With Kodi software, you can transform this small computer into a powerful media hub that plays movies, TV shows, music, and more.
To build a Raspberry Pi media center, you’ll need a Raspberry Pi (preferably a Pi 3 or newer for better performance), a microSD card, and basic accessories like power supply and case. The Pi 3 works well because it includes built-in Wi-Fi and enough processing power to handle HD video.
Several operating systems are available that include Kodi. Popular options include OSMC, XBian, and LibreELEC. These are specifically designed to run Kodi efficiently on the Raspberry Pi hardware.
Installation is straightforward. Download your chosen OS image, write it to the microSD card, and boot up your Pi. Most Kodi distributions feature a simple setup wizard that walks you through initial configuration settings.
Once installed, Kodi provides an intuitive interface for accessing all your media. You can add local media by connecting an external hard drive or USB drive containing your movies, TV shows, and music directly to the Pi.
Network streaming is another powerful feature. Kodi can connect to media stored on other computers or NAS devices on your home network. This eliminates the need for large local storage on the Pi itself.
For expanded storage options, some users connect external SSDs using USB to SATA cables. A 480GB SSD provides ample space for a sizeable media library right at the device.
Controlling your media center is easy with various remote options. Many users prefer a wireless mini keyboard that includes a touchpad. Alternatively, you can control Kodi with smartphone apps, standard IR remotes, or game controllers.
Kodi supports add-ons that extend functionality beyond basic media playback. These add-ons provide access to streaming services, weather information, games, and other features to enhance your media center experience.
For gaming enthusiasts, some distributions like RetroPie can be integrated with Kodi. This combination creates an all-in-one entertainment system that handles both media playback and retro gaming.
The Raspberry Pi media center excels in both functionality and power efficiency. It consumes far less electricity than a traditional computer or gaming console, making it economical to leave running continuously.
Setup typically takes under an hour, even for beginners. The online Raspberry Pi community offers extensive tutorials and troubleshooting help through forums and websites if you encounter any issues.
The total cost for a complete Kodi media center typically ranges from $50-100 depending on which accessories and storage options you choose. This makes it significantly more affordable than commercial media center devices with similar capabilities.
Understanding Raspberry Pi
The Raspberry Pi has revolutionized computing by providing an affordable, credit card-sized computer that can handle various tasks. This versatile device offers both simplicity for beginners and powerful capabilities for advanced users.
What is Raspberry Pi?
Raspberry Pi is a small, low-cost computer developed by the Raspberry Pi Foundation in the United Kingdom. It was originally designed to promote computer science education in schools and developing countries.
Unlike traditional computers, Raspberry Pi consists of a single circuit board with a processor, RAM, and input/output ports. Most models are about the size of a credit card and cost between $10-$75 depending on the version.
The latest model, the Raspberry Pi 5, features a quad-core processor, up to 8GB of RAM, and various connectivity options including HDMI, USB, Ethernet, and wireless capabilities.
Raspberry Pi runs primarily on Linux-based operating systems, with Raspberry Pi OS (formerly Raspbian) being the most common. This makes it an excellent platform for learning Python programming and other coding languages.
Benefits of Using Raspberry Pi
Raspberry Pi offers remarkable versatility at an affordable price point. Users can transform it into virtually any digital device, from media centers to weather stations.
Cost-effectiveness: At a fraction of the cost of traditional computers, Raspberry Pi makes computing accessible to everyone. This democratizes technology access for educational institutions and hobbyists alike.
Flexibility: The Pi can function as a desktop computer, server, media center, or the brains behind countless DIY projects. Its GPIO pins allow direct connection to sensors, motors, and other electronic components.
Community support: A massive global community shares project ideas, tutorials, and troubleshooting advice. The Raspberry Pi forums and Reddit communities provide excellent support for both beginners and experts.
Educational value: Learning with Raspberry Pi develops valuable skills in programming, electronics, and problem-solving, preparing users for careers in technology and engineering.
Getting Started with Raspberry Pi Projects
Jumping into Raspberry Pi projects requires some basic setup and equipment. With the right tools and proper configuration, you’ll be ready to create everything from simple home automation to advanced robotics.
Essential Components and Tools
To begin your Raspberry Pi journey, you’ll need some basic hardware. The most important item is the Raspberry Pi board itself, with the Pi 4 or Pi Zero 2 W being excellent choices for beginners. These small computers pack impressive capabilities into a credit card-sized device.
You’ll also need:
- Micro SD card (16GB minimum recommended)
- Power supply (USB-C for Pi 4, micro-USB for older models)
- HDMI cable or adapter
- USB keyboard and mouse
- Monitor or TV for display
- Case (optional but recommended for protection)
For more advanced projects, consider purchasing sensors, LEDs, breadboards, and jumper wires. These components enable you to build interactive flying robots or electronic displays.
Setting Up Your Raspberry Pi
Setting up your Raspberry Pi is straightforward. First, download the Raspberry Pi Imager tool from the official website to flash Raspberry Pi OS onto your micro SD card.
Insert the SD card into your Pi, connect the keyboard, mouse, and display, then plug in power. The system will boot up and guide you through initial configuration including:
- Setting your username and password
- Connecting to WiFi
- Updating system software
- Setting regional preferences
Once configured, you can explore beginner-friendly projects that don’t require additional components. Try creating a weather forecast display or a live departures board using just your Pi and an internet connection.
For coding beginners, the Pi offers Python as an ideal starting language. Many free tutorials exist specifically for Raspberry Pi programming, making it accessible for all skill levels.
Frequently Asked Questions
People use Raspberry Pi for many different projects, from simple beginner tasks to complex engineering solutions. The questions below address common project ideas for various skill levels and interests.
What are some advanced project ideas for Raspberry Pi for engineering students?
Engineering students can build a self-driving robot car using Raspberry Pi as the brain. This project incorporates computer vision, motor control, and sensor integration for a comprehensive learning experience.
Creating an IoT-based environmental monitoring system represents another advanced option. Students can connect multiple sensors to track air quality, temperature, and humidity, then analyze data patterns using Python and machine learning algorithms.
A Raspberry Pi cluster computing project allows engineering students to explore parallel processing concepts. By connecting multiple Pi units, students can distribute computational tasks and learn about networking protocols.
What innovative Raspberry Pi projects are suitable for a final year student’s thesis?
A gesture-controlled prosthetic arm using Raspberry Pi and machine learning offers an innovative thesis project. Students can develop algorithms that interpret EMG signals to control the mechanical components of the prosthesis.
Smart agriculture systems represent another thesis-worthy project. Using soil moisture sensors, automated irrigation systems, and crop monitoring cameras, students can develop a comprehensive farming solution powered by Raspberry Pi.
Creating a real-time language translation device can showcase both technical and practical skills. This project combines speech recognition, natural language processing, and audio output to create a portable translation tool.
Can you suggest some practical Raspberry Pi projects that can be implemented in a home environment?
A home automation hub using Raspberry Pi can control lights, appliances, and thermostats. This project integrates with existing smart home systems and adds customizable features that commercial hubs might not offer.
Creating a network-attached storage (NAS) system provides a practical home server for storing and sharing files. The Pi becomes a central file repository accessible from any device on the home network.
A Raspberry Pi can power a security camera system with motion detection capabilities. When movement is detected, the system can automatically save footage and send alert notifications to the homeowner’s phone.
What are some engaging Raspberry Pi projects suitable for adults with an interest in technology?
Building a smart mirror creates an interactive display that shows time, weather, news, and calendar appointments while functioning as a regular mirror. This project combines woodworking skills with programming.
A digital photo frame with cloud synchronization offers both nostalgia and modern connectivity. Photos can update automatically from services like Google Photos or Dropbox.
Creating a retro gaming console appeals to many adults interested in technology. The Raspberry Pi can emulate numerous classic gaming platforms, bringing back childhood favorites with modern HDMI output.
Could you provide examples of simple Raspberry Pi project ideas for beginners?
A local weather forecast display represents an excellent beginner project. It requires minimal setup and teaches basic API interaction while creating something immediately useful.
Setting up a simple Pi-hole ad blocker protects all devices on a home network from unwanted advertisements. This project requires little hardware beyond the Pi itself but provides significant everyday benefits.
Creating a Bluetooth speaker system offers beginners a straightforward introduction to audio projects. With just a few components, beginners can build a functional audio device.
What type of Raspberry Pi projects can enhance learning for students in educational settings?
A programmable robot provides hands-on experience with coding concepts. Students can write programs that control movement, respond to sensors, and complete simple tasks, making abstract programming concepts tangible.
Creating interactive storytelling projects helps students develop narrative skills alongside technical abilities. Using a Pi with touch sensors or buttons, students can build choose-your-own-adventure style presentations.
A classroom weather station project incorporates science, math, and computer skills. Students can collect environmental data, create graphs, and analyze patterns while learning Python programming and basic electronics.


